
I know this is a crochet basic and there are loads of tutorials out there already but I wanted to do this for 2 friends in particular, first is our friend Michaela who we met in Corfu. On our last holiday, I took a crochet project with me which I would work on while having our morning coffee, Michaela expressed an interest in taking up crochet so this is to help get her started. The second is a very creatively talented young lady who is a whiz with a pair of knitting needles and although she has crocheted some lovely things tells me she struggles to make a Granny Square actually square. So for these two lovely people and anyone else out there who needs a helping hand to get started, here goes…….
Make a slip knot to start and chain 6.
 Join with a slip stitch into the first chain to form a ring.

Chain 3, these will count as the first treble crochet for the first cluster.
 Work another 2 trebles into the centre of the ring to form the first cluster.
 Chain 3 to make the first corner.
 Work another 3 trebles into the centre of the ring to form the second cluster.
 Chain 3 to form the second corner followed by 3 more trebles to make the third cluster.
 Work 3 chain to form the third corner and another 3 trebles to make the fourth cluster. To complete this first round chain 3 to form the fourth corner.

Then slip stitch into the third chain of the first 3 chain worked.

Slip stitch across the next 2 trebles.

And again into the corner three chain space created on the previous round.

Chain 3, these 3 chain count as the first treble.

Continue working into the same corner space, work another 2 trebles, chain 2, 3 trebles to form the first corner of the second round.

Working into the next corner space, *3 trebles, 2 chain, 3 trebles* to form the second corner.

Repeat * to * into the next corner space to form the third corner.

And into the last corner space to make the fourth corner.

Slip stitch into the third chain of the first 3 chain worked at the beginning of the round.
As with the previous round slip stitch across the first 2 trebles and into the first corner space of the previous round.
 Chain 3, these 3 chain count as the first treble, continue working into the same corner space, work another 2 trebles, chain 2.
 Work a further 3 trebles to form the first corner of the third round.

Chain 1, work 3 trebles into the next space, chain 1.
 Working into the next corner space, *3 trebles, 2 chain, 3 trebles chain 1, work 3 trebles into the next space, chain 1*.

Repeat * to * twice more, then to complete the round slip stitch into the third chain of the first 3 chain worked at the beginning of the round.
 Continue adding rounds until your square is the desired size noting that each round will add another space on the straight edges.
Four rounds.

Five Rounds.

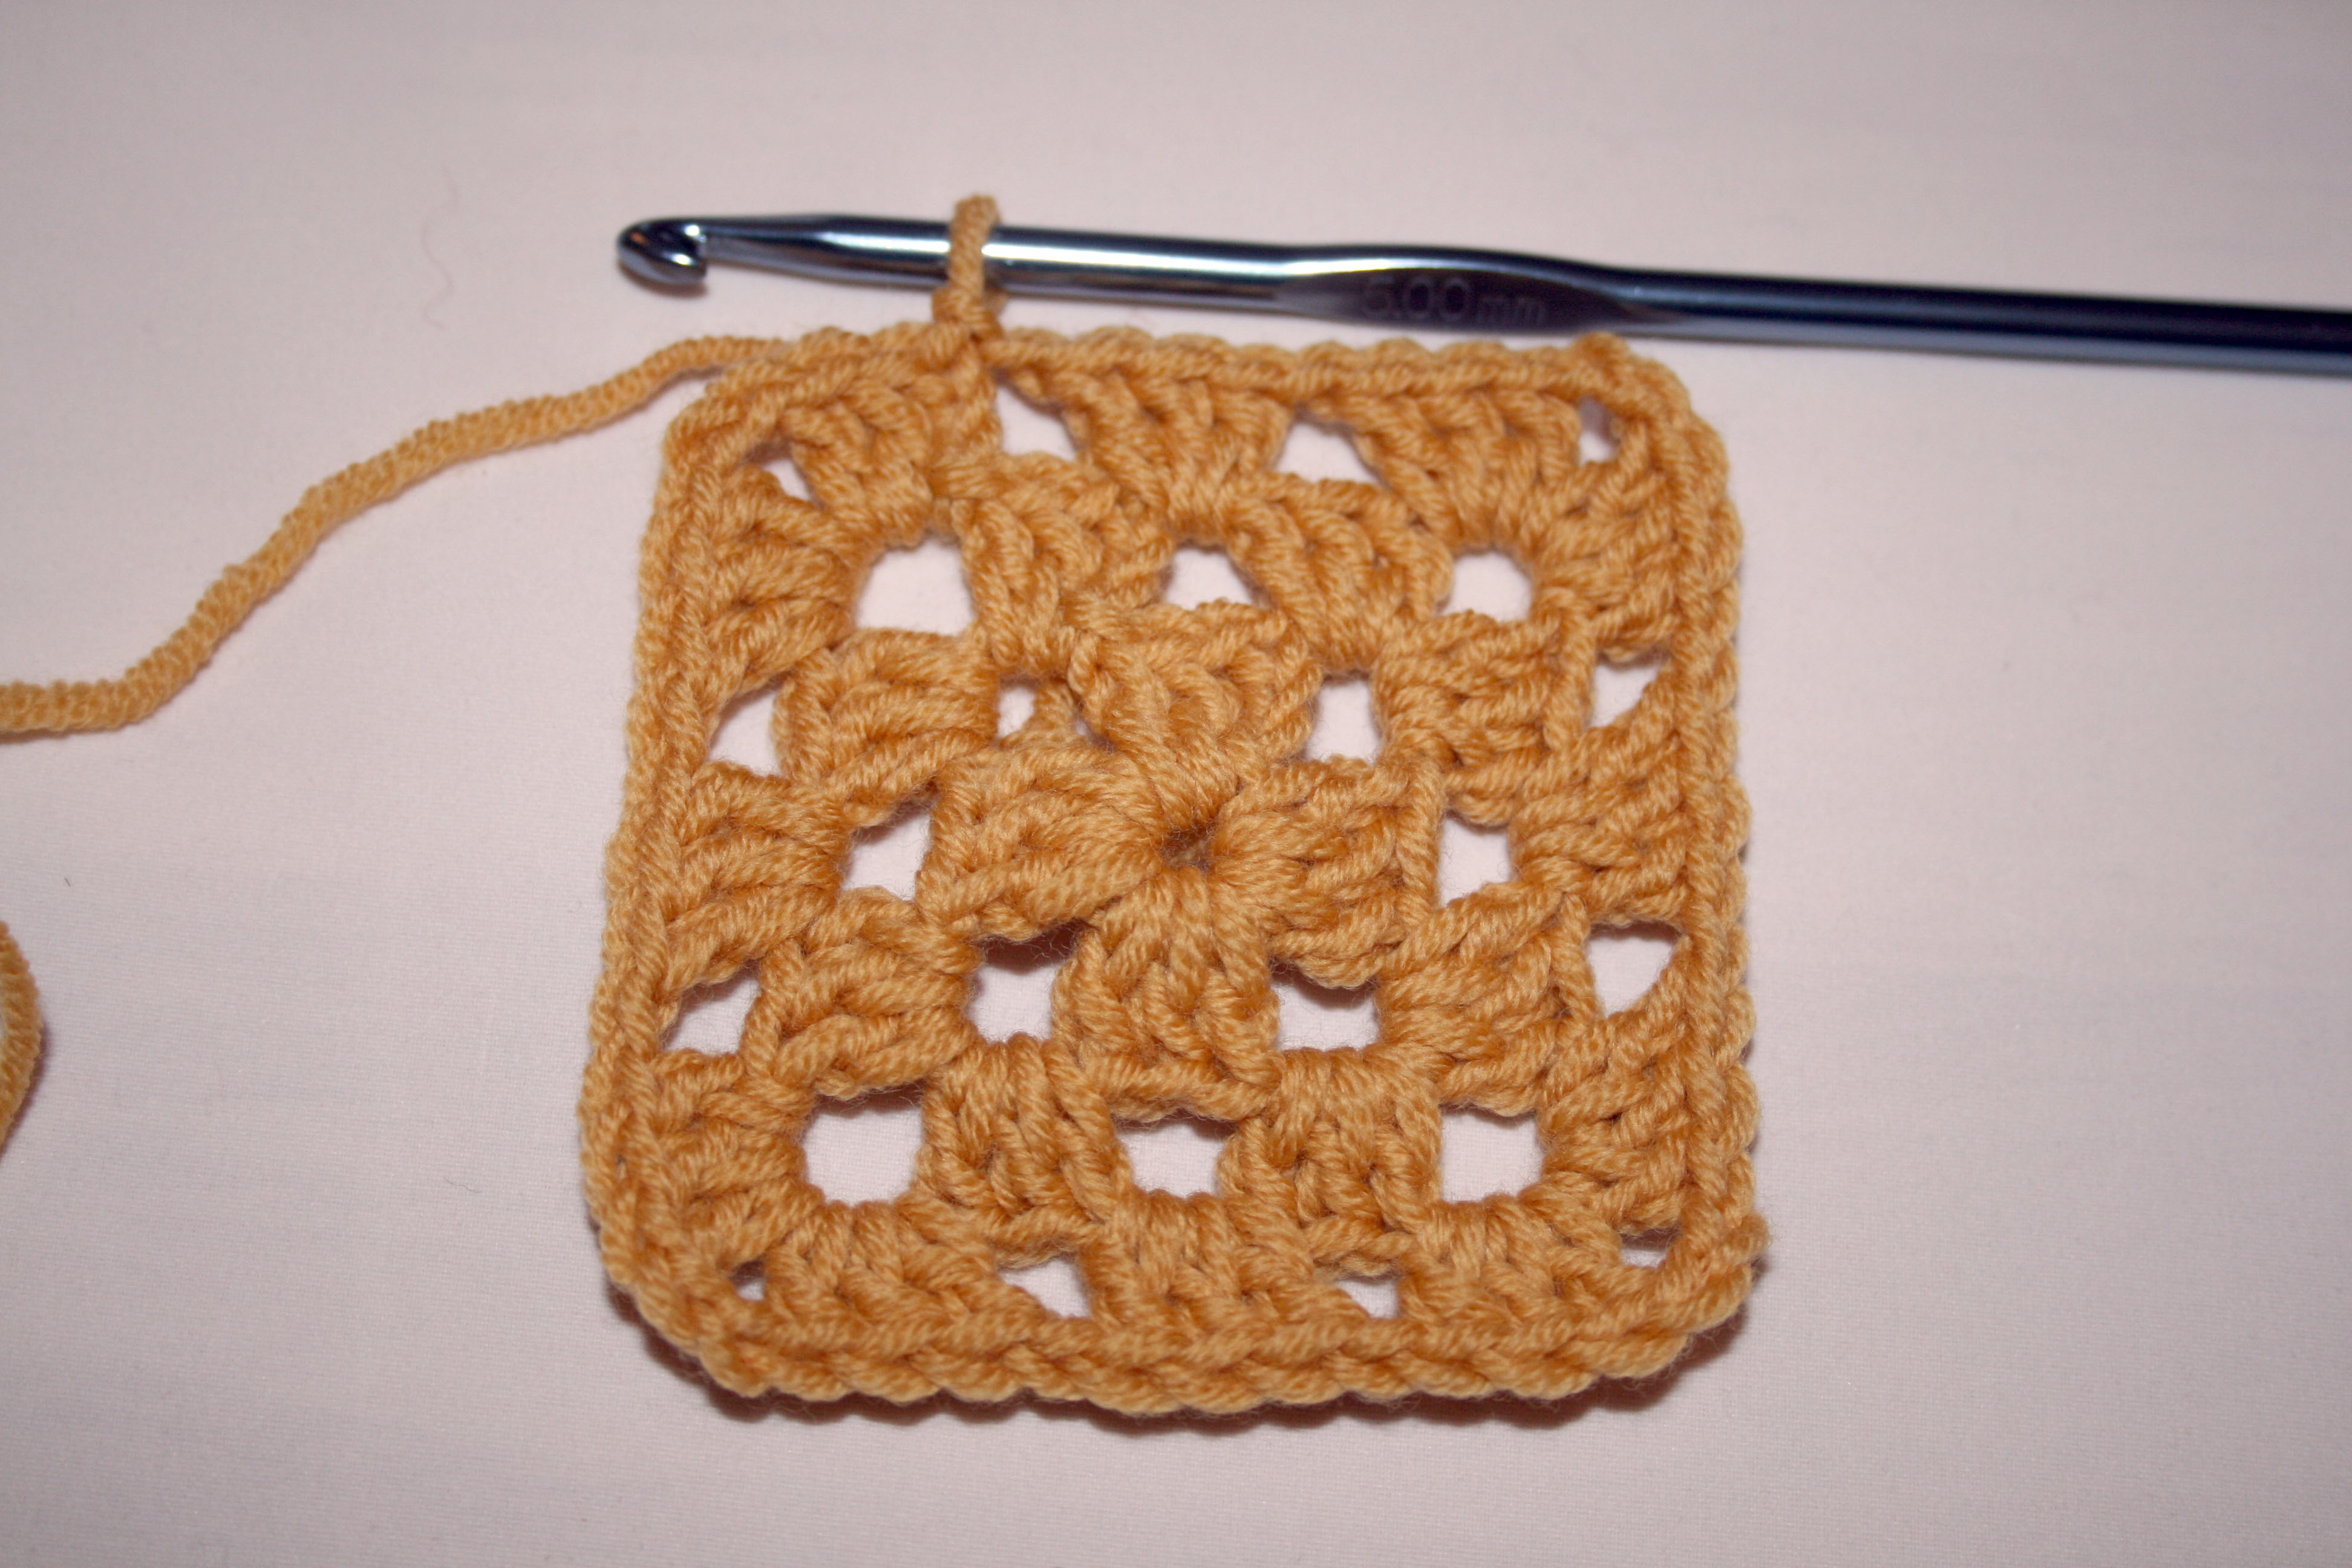
To complete my square I did six rounds ending with a slip stitch into the third chain of the first 3 chain worked at the beginning of the round.
 You can end your square here but I like to finish with a round of double crochet as this gives a nice firm finish and a neat joining edge if you are joining several squares together. As we will be working into each treble and chain space of our last round there is no need slip stitch across to the corner space to start this edging round, you can continue from the slip stitch at the end of the final round.
Chain 1, this counts as the first double crochet.
 Work first double crochet into the second treble of the previous round, second double crochet into the third treble. Work 3 double crochet into the corner space.
Continue to work 1 double crochet into each of the next 3 trebles of the corner.
Work 1 double crochet into the next chain space.
 Continue all the way round working 1 double crochet into each treble and each chain space of the previous round and 3 double crochet into each corner space.
 Slip stitch into the chain at the beginning of the round and snip your yarn leaving a 2-3 inch tail.

To fasten off pull the tail through the loop on the hook.

Pull firmly.

Now all you have left to do is sew in the loose ends at the beginning and the end of your Granny Square.
Thread the tail into a wool needle and push through the chain next to your finishing knot to the back of your square. Then sew into the back of the double crochet round.

Cut of any loose ends.
Thread the tail at the start of your work onto the wool needle and sew into the back of the trebles on the first round, this will also tighten the centre ring.

Cut off any loose ends and there you have it, your first Granny Square complete.
 I hope this tutorial is useful to my good friends and anyone else out there who wants to get started. If you have any questions or would like any further information please feel to ask away and I will do my best to help.

Hehe no no no I’m far from being a pro!!! I made this granny square following Bella Coco’s video crochet tutorial, then I found yours which is easier to bookmark!
LikeLike
This is so nice!
LikeLike
So pleased you like it, a bit photo heavy but I wanted to show every stage to make it easy to follow. Did you use the tutorial or are you already a pro?
LikeLiked by 1 person
What an excellent tutorial. I love the pics, wish I had this when I was in high school. The teacher, failed me, as she thought I did it wrong, but after looking at yours, I know I did it correct. Maybe I was missing something along the road. Again, great tutorial!
LikeLike
Well I hope I have not done it wrong, it works for me. Are you still in touch with your old teacher? We could send her a link and ask her to re-mark you!!
LikeLike
No, am sure she has moved on, and besides nearly 30 plus years later, I am not too worried about it. At the time I was insulted, if a teenager could feel that way. Guess more so, was mad..He he he
LikeLike
Awesome! I wish I had this when I was making my first granny square afghan! My Mother-in-Law showed me how to once and I was supposed to remember every step… so I decided to just try it and pull out miles of yarn until I got it right! I am positive this post will save a lot of readers many finger cramps and curse words!
LikeLike
I am so glad you like this post, it did take ages to do all the step by step photos but I know this is what helped me when I was starting out so I wanted to pay it back for all the help that I gain.
LikeLike
Hi loved the tutorial….very well done with all the pics also, Very helpful. I tried before doing this to do a granny square scarf… when sewing together it did not do right….it wound up in scallops. I decided maybe I had sewn too tightly….but since, someone mention the change of different yarns was the problem…needed to also change the needle to accommodate the differences of yarns…I cannot seem to find the right one…so looks as though I am destined to use only the same yarns when doing a granny. I was hoping to use of bits of my stash leftovers. But this is simply not working for me….If you ever do a tutorial for us dummies on the changing of yarns for the granny squares….I will be your first student. I have done many granny square afghans but must have used such similar yarns throughout that it did not causes a problem, Anyway I am a new fan and will definitely be keeping up with your blogging. Thanks so much for sharing your knowledge.
LikeLike
Thank you so much, I am really happy to hear that my tutorial has helped you to develop your crafting skills. I will keep in mind your request for a tutorial on mixing yarn types in a project, I have quite a lot on at the moment but I do keep a running list of things to investigate and blog about so I will add this to my list. Thanks for visiting and I look forward to staying in touch.
LikeLike
Great tutorial!! Thank you.
LikeLike
So pleased to be of assistance, hope to see you again soon.
LikeLike
This is so clear to follow – thank you!
LikeLike
It’s my pleasure, so glad it has been of help. Thanks for visiting, I hope you will come back soon, I am going to pop over and see you too.
LikeLike
Yay! I’m so glad to have finally found an awesome granny square tutorial. I will definitely be sending people here when they ask how to make one. Thanks for posting! 😉
LikeLike
So pleased you are finding this useful, you spend ages photographing and writing it up just in the hope that it will help someone. Thanks for visiting and spreading the word, see you again soon.
LikeLike
How do you join the squares into a larger project? I have made a few blankets but only using a few simple stiches. I have made a few granny squares to practice but I don’t know how to join them together so they look good. Any help would be appreciated. Thanks, Conrad
LikeLike
Hi Conrad, if you can hang on till the weekend I am putting together a tutorial about joining squares. There are different ways to do it but I like to crochet them together, in simple terms you put 2 squares right sides together and slip stitch the 2 outer edges of the v top stitch. When you turn the squares over you have a neat line formed by the inner edges of the v. Hope this helps.
LikeLike
This a well detailed tutorial! I love it!
LikeLike
Thank you, it is amazing how people do it slightly differently, you just have to find the way that works best for you.
LikeLike
GREAT PHOTOS! Granny squares were the one thing I just couldn’t “get” for some reason for a long time. Then I found a book that showed detailed photos and I “got it”! Your photo’s will help so many to “get it” and have that wonderful “I did it!” feeling. Great job 🙂
LikeLike
Thank you for your kind comments, I hope you are right and that it will help others. I have had lots of help from other people too, thats what I love so much about our online community here on WordPress, the sharing of knowledge and ideas.
LikeLike
Hi! I have enjoying reading your blog so I nominated you for several awards. Find out details here:
crochetwithpassion.wordpress.com/2013/06/05/thank-you-for-naminated-me/
LikeLike
This is a brilliant tutorial – I am planning a granny square scarf (after seeing the one that Ann wore on episode 3 of the Great British Sewing Bee – I got serious Envy, and ordered six balls of yarn almost the next day) – and this will be very helpful indeed.
LikeLike
I love granny squares, you can make them into so many different things but they work really well as a scarf, I made one for my sister last year all shades of blue and she loves it. Good luck, let me know if I can do anything to help.
LikeLike
I’ve been wanting to learn crochet. This will be a great tutorial to try!
LikeLike
I am so pleased to help you on your crochet journey, if you need any help please feel free to ask and I will help if I can. I hope you enjoy crochet as much as knitting.
LikeLike